Open the model menu by right-clicking an object in the scene.
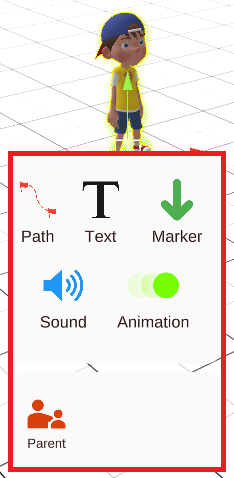
a. Path #
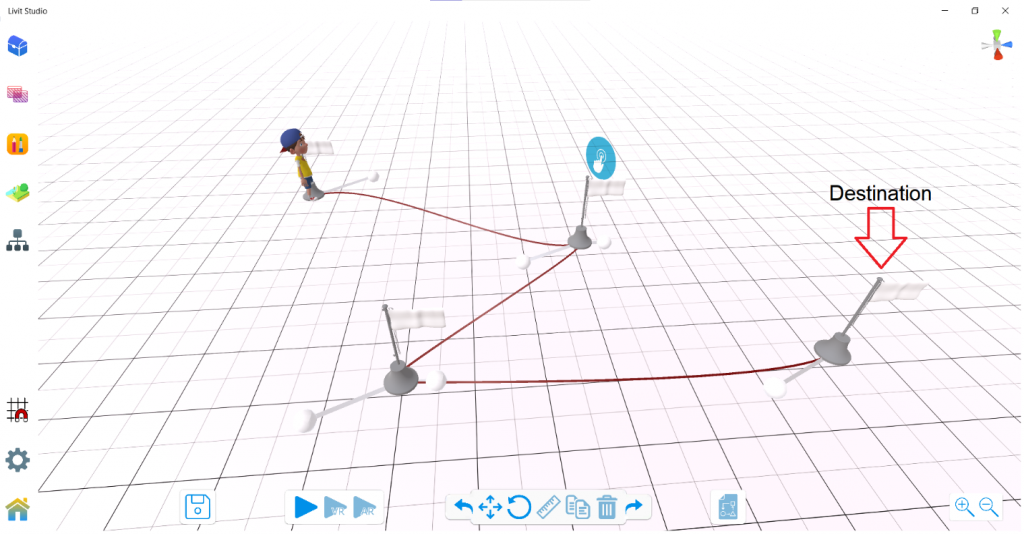
To add a defined path that the object will follow.
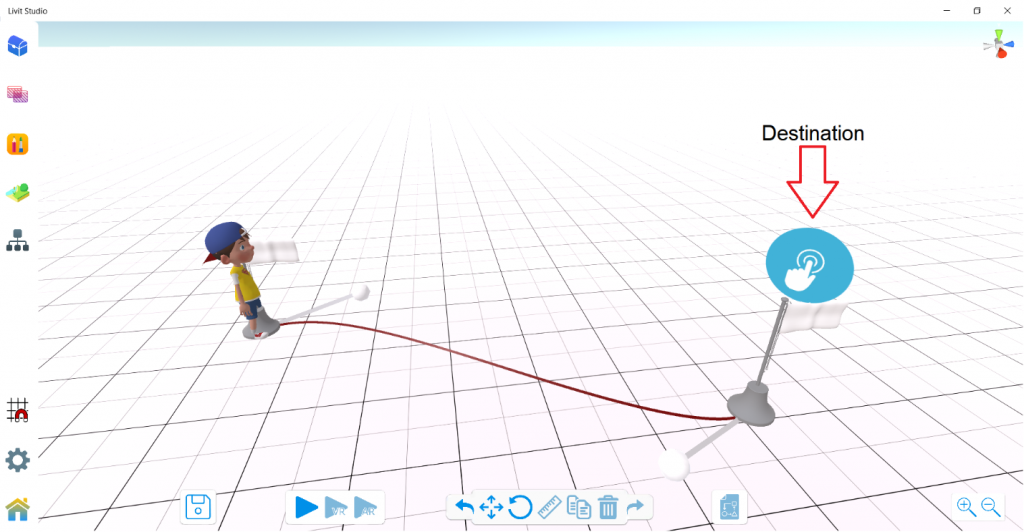
i. Path inspector menu #
Open the path inspector menu by pressing the button above the first path point after the starting point.
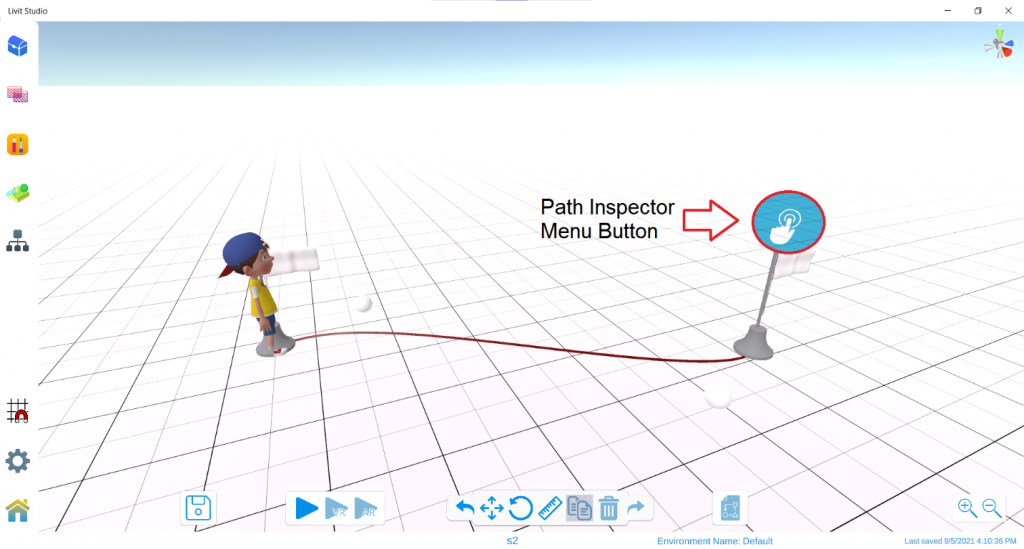
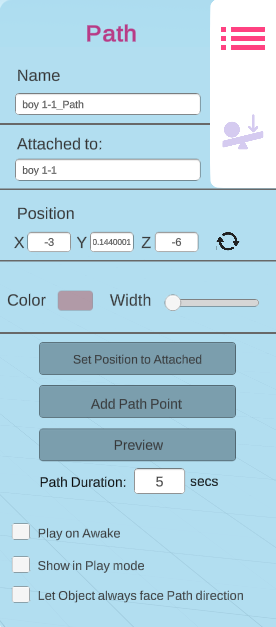
The path inspector menu contains the options of the path.
1. Set Position to Attached #
To reset the position of the path so that its starting point is placed in the same position as the attached object.
2. Add Path Point #
Path points help you customize the path in your desired way.
3. Preview #
Simulates what the path will look like when it starts.
4. Path Duration #
Determines the duration of the path from start to end.
Note that: the lower the duration will be, the faster the object will move on the path.
5. Play On Awake #
To make the object start moving on the path when Play mode starts.
6. Show In Play Mode #
To show or hide the red lines of the path in play mode.
7. Let Object Always Face Path Direction #
To adjust the rotation of the object actively so it is always looking at the forward direction of the path.
b. Text and Arrow #
A shortcut for the Add Text and the Add Marker tools, but the added text or marker will be attached to the selected model.
c. Sound #
To attach a sound to this object.
Note that: you can attach multiple sounds to the same GameObject.
d. Animation #
To choose an animation for this object.
e. Parent #
To choose a parent for this object and make it a child.
A child follows its parent in position, rotation and scale.
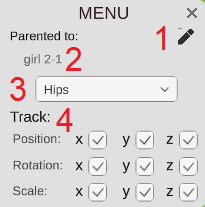
i. Parent menu: #
1. Edit parent: #
To choose a new parent for this GameObject.
2. Parent name: #
The name of the current parent of this GameObject.
3. If the parent is a human model, you can choose which body part the child should follow. #

4. Track: #
To select or deselect any component in position, rotation or scale so that the child knows whether it should follow it or not.