Game Development Tutorial
0 – Introduction
We will develop a simple game where the main player is the taxi and the objective is to give a ride to all the people on the map before the time runs out.
I – Creating the project and choosing the environment
Open Livit Studio, create a new project called “CrazyTaxi”, we will only need one scene for this project, we will call it here “S1”.
After creating the project, choose the environment “Town”.
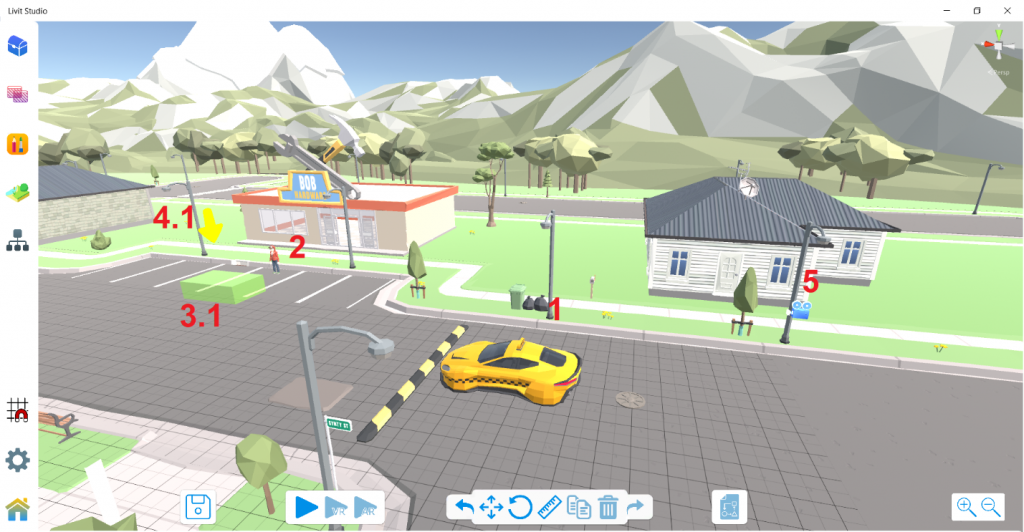
II – Adding objects to the scene
- The taxi that will be the main player (We chose SciFi taxi), then add 3 sounds to the SciFi taxi (engine start sound, client pick up sound, client drop off sound)
- A random character that will act as a client (We chose Boy2), Call him “Client1”
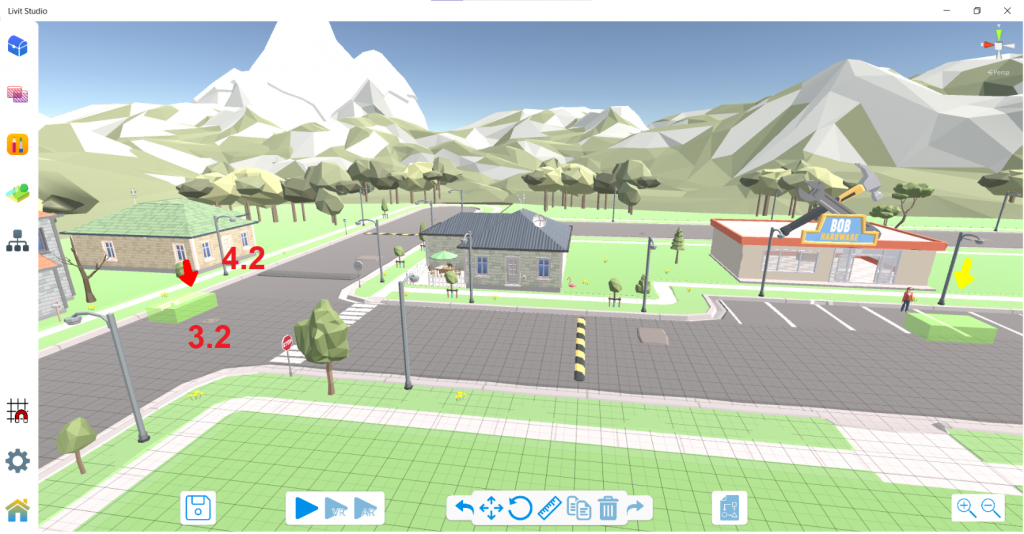
- 2 Trigger boxes: One in front of the client called “Client1PickUp” and the other at the destination point called “Client1Destination”.
- 2 Arrows: set the color of the first to yellow and make it point to the client and set the other one to red and make it point to the destination point, the check “Animate In Runtime” in both.
- Place the main camera at the back of the SciFi taxi, Change its Play Mode View to Cinematic then, set its parent as the SciFi taxi.
III – UI elements
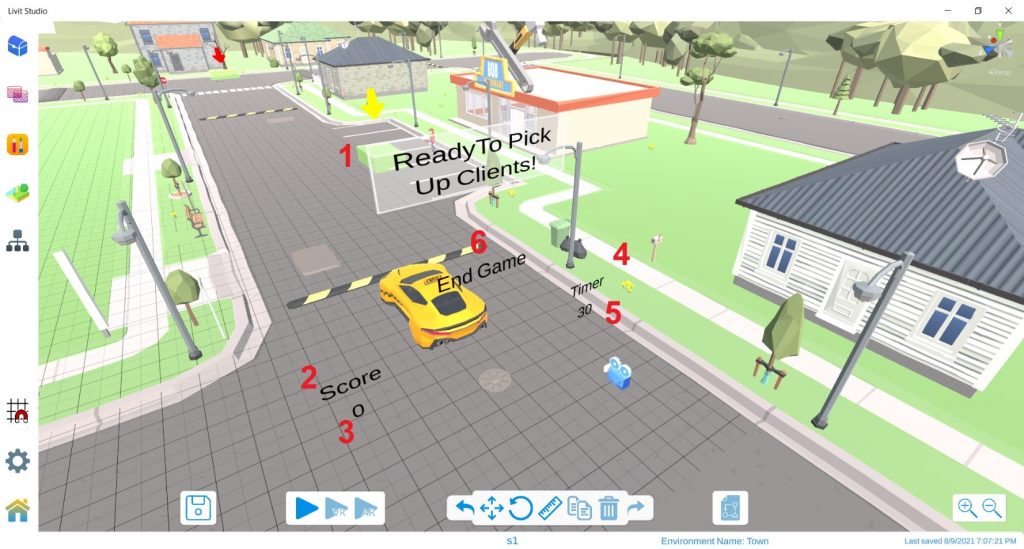
Add 6 text objects as following:
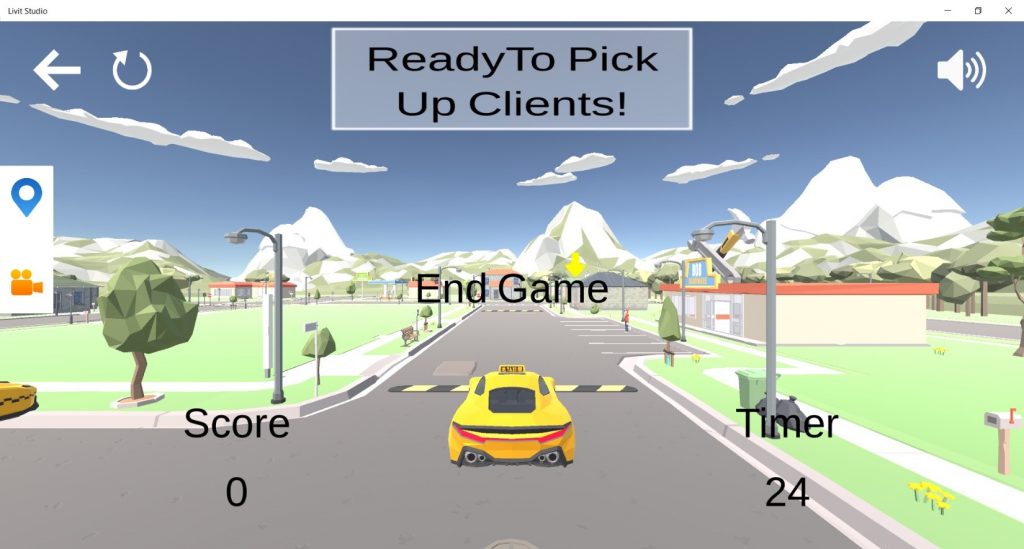
- Name it “StatusText”, position it at the Top Middle of the camera view. This will be used to inform you about the status of your ride. Set its initial text as: “ReadyTo Pick Up Clients!” .
- Name it “ScoreText”, position it at the Bottom Left of the camera view. Set its initial text as: “Score”.
- Name it “ScoreNumText”, position it under “ScoreText”, this will display the actual score number, Set its initial text as: “0”.
- Name it “TimerText”, position it at the Bottom Right of the camera view. Set its initial text as: “Timer”.
- Name it “TimerNumText”, position it Under “TimerText”. Set its initial text as: “30” (For 30 seconds).
- Name it “EndGameText”, position it at the Middle of the camera view. Set its initial text as: “End Game”.
IV – Code
1. Variables
Here is a list of all the variables we are going to use through the game development. You can create them all from the beginning or one by one as we go through the tutorial
| Name | Type | Initial Value | Description |
| Client | Int | 0 | 0 Means that no client is currently in the taxi 1 Means that “Client1” is currently in a taxi 2 Means that “Client2” is currently in a taxi And so on… |
| Score | Int | 0 | The score is the number of successfully completed rides. |
| Timer | Int | 30 | You should complete all the available rides before the time runs out. |
| LvlCompleted | Bool | False | To indicate that you completed the level successfully. |
| stopMovement | Bool | False | To indicate that you finished the game (Either won or lost) to stop the car from moving. |
2. EndGameText
Disable the EndGameText on start because it should only appear at the end of the game.
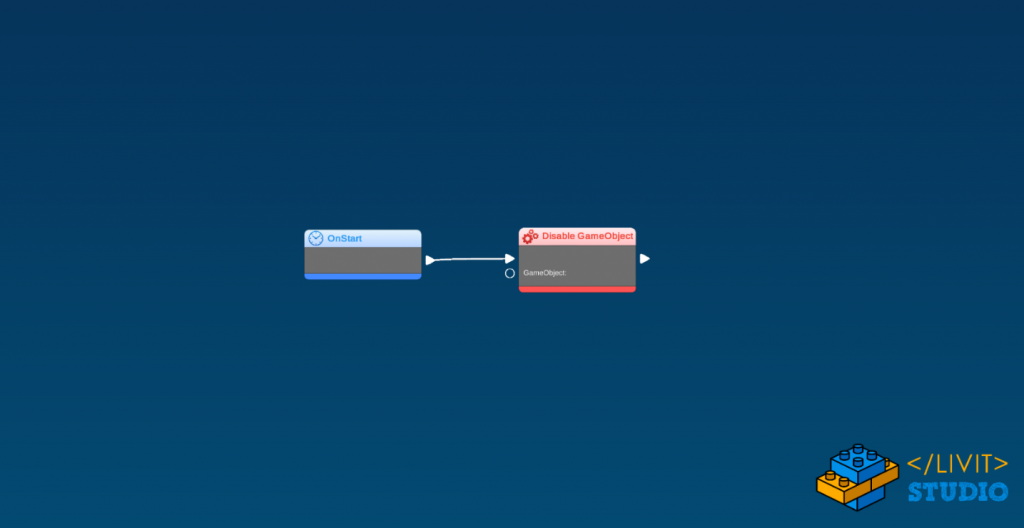
3. Red Arrow
Disable the red arrow on start because it should only appear when you pick up the client (same code as the previous picture).
4. SciFi Taxi
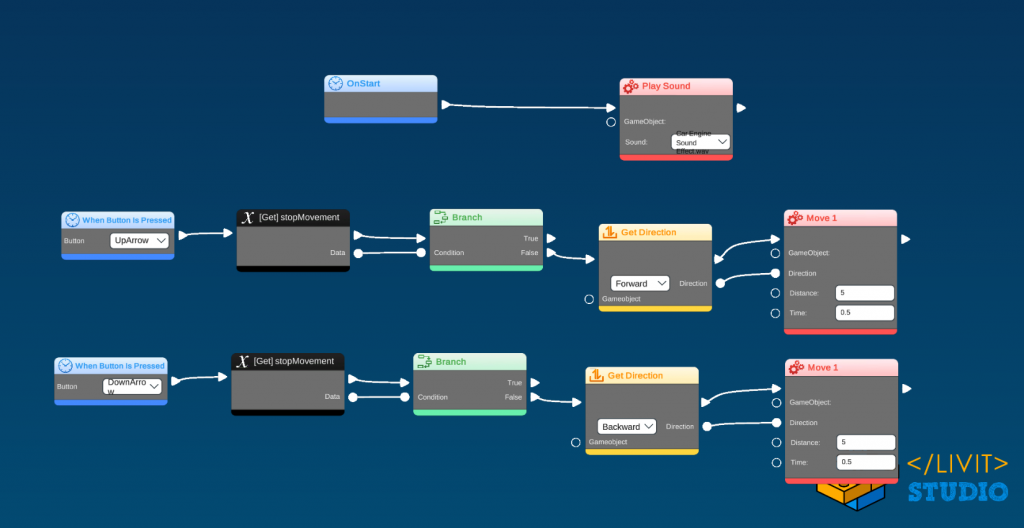
Script 1: Forward and backward movement
- On start, play the car start engine sound.
- Forward movement: when you press the Up Arrow key, check first if the stopMovement variable is false (this indicates that the game isn’t finished yet and you are able to move), then get the forward direction of the car and move it in this direction with a distance 5 in time 0.5
Backward movement: when you press the Down Arrow key, check first if the stopMovement variable is false, then get the backward direction of the car and move it in this direction with a distance of 5 in time 0.5
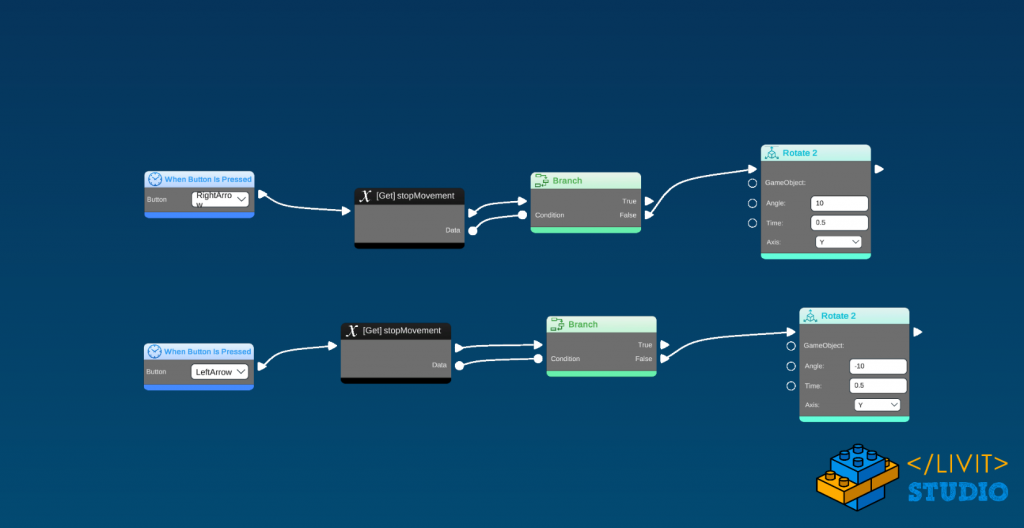
Script 2: Right and left movement
- Right movement: when you press the Right Arrow key, check first if the stopMovement variable is false, then Rotate with angle 10 in time 0.5
- Left movement: when you press the Left Arrow key, check first if the stopMovement variable is false, then Rotate with angle -10 in time 0.5
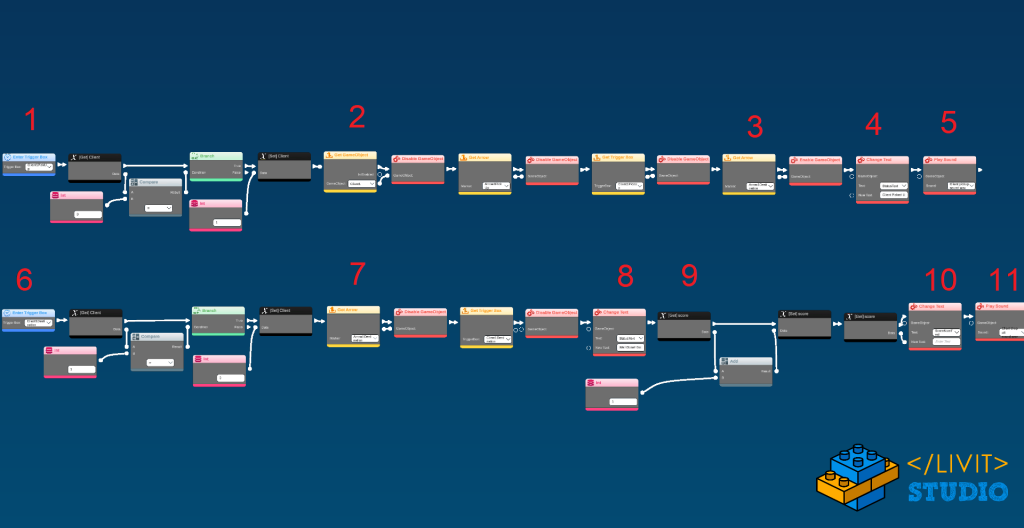
Script 3: Client pickup and drop off
- When you enter the trigger box “Client1PickUp”, check if Client variable = 0 (this means that you have no clients currently in the car), if this is correct then you are ready to take this client so set Client to 1.
- Disable the “Client1” game object, disable the trigger box “Client1PickUp” (so you pick up this client again during the game), disable the arrow pointing to this client (yellow arrow).
- Enable the arrow pointing to the destination point (red arrow)
- Change the “StatusText” to “Client Picked Up! Drop Him Off At The Destination Point”
- Play the “Client Pickup sound”
- When you enter the trigger box “Client1Destination”, check if Client variable = 1 (this means that you are in the right destination for this client), if this is correct then you are ready to drop this client off so set Client to 0, disable the trigger box “Client1Destination”.
- Disable the arrow pointing to the destination point
- Change the “StatusText” to “Well Done! Go Pick Up Another Client”
- Set the new score to the old score + 1.
- Display the current score
- Play the “client drop off sound”
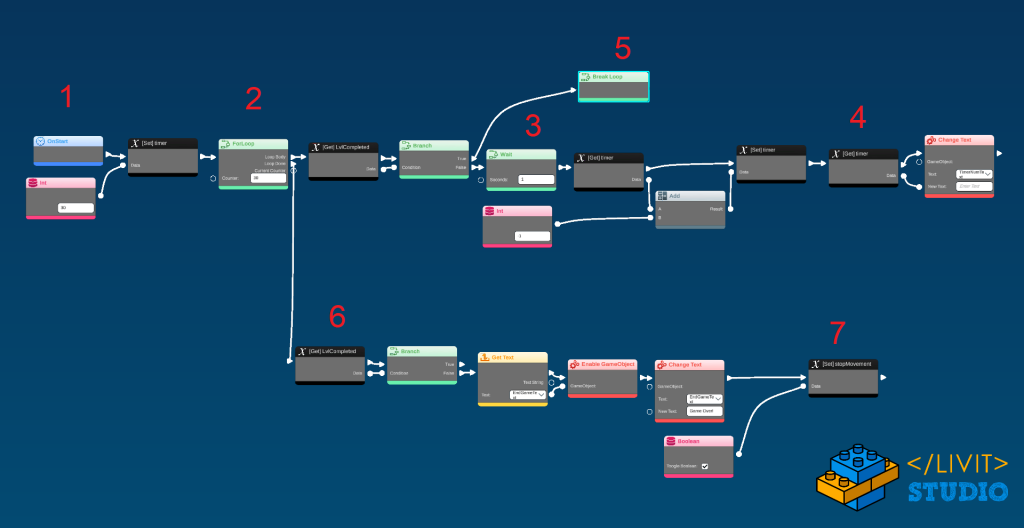
5. TimerNumText
- On start, set the timer variable to 30
- Make a For loop with counter 30
- On each loop, check if LvLCompleted is equal to false, wait for 1 second and decrease the timer variable by 1
- Display the new timer
- If the LvLCompleted is equal to true, break the loop
- When done, if the level is not completed then the time has run out, enable the text “EndGameText” and set its value to “Game Over!”.
- Set the stopMovement variable to true
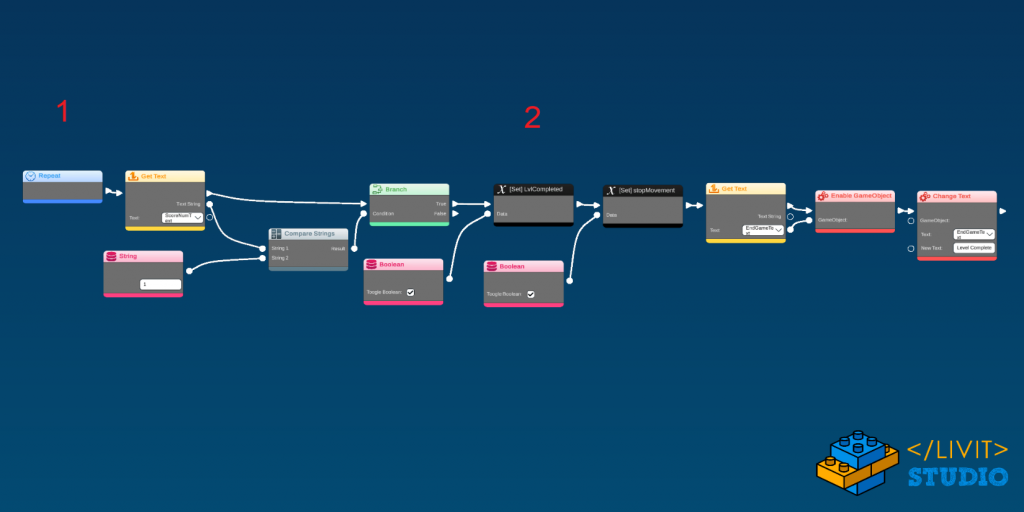
6. ScoreNumText
- In a repeat block, compare the current score with the maximum number of clients available.
- When the current score reaches this number, set LvlCompleted to true, set stopMovement to true, Enable the “EndGameText” and set its value to “Level Completed!”.
V – Extras
In this tutorial, we only demonstrated how you can give a ride to only one client, but you can add more clients by adding other characters in the scene with their corresponding trigger boxes and arrows, then duplicate script 3 in SciFi Taxi and modify the trigger boxes, the arrows and the client number of each client, then change the maximum number of clients in ScoreNumText script to the new client’s number. That’s it!