Game Development Tutorial
I – Introduction
This game is a First-person game, which means that the player is the camera so most of the game code will be put inside the main camera. The player has 3 lives and he needs to pass all 7 obstacles and reach the finish line in the given time, some of these obstacles will slow the player down and others will affect his life.
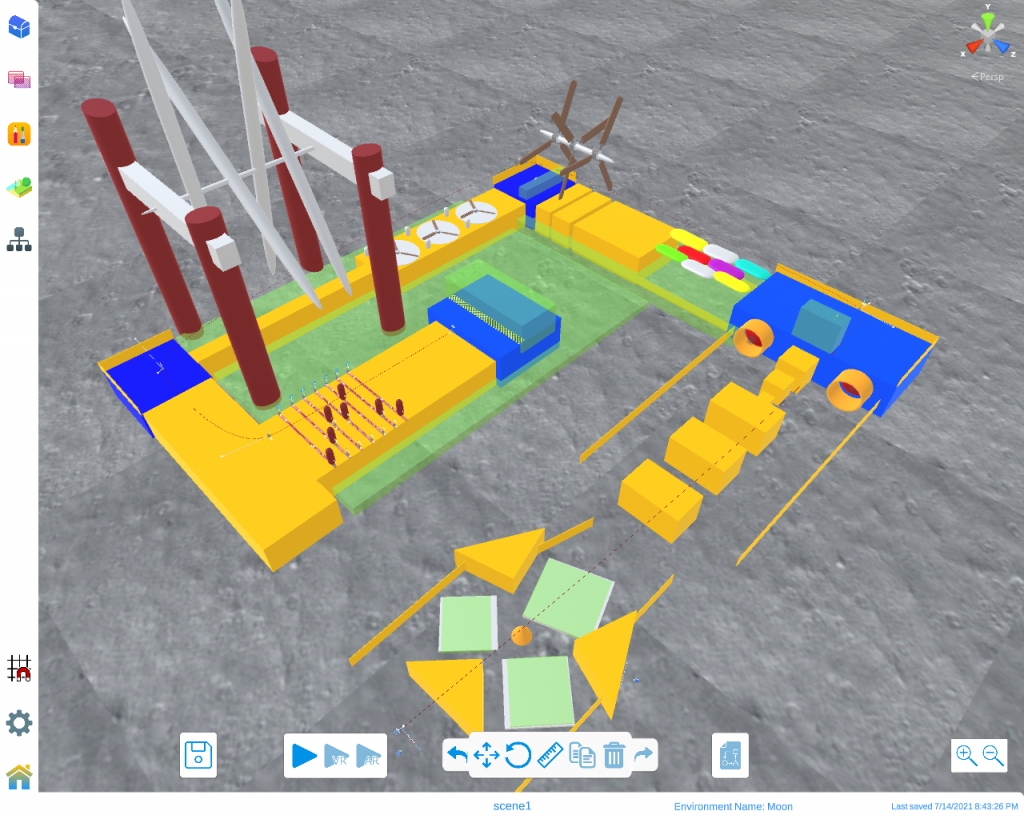
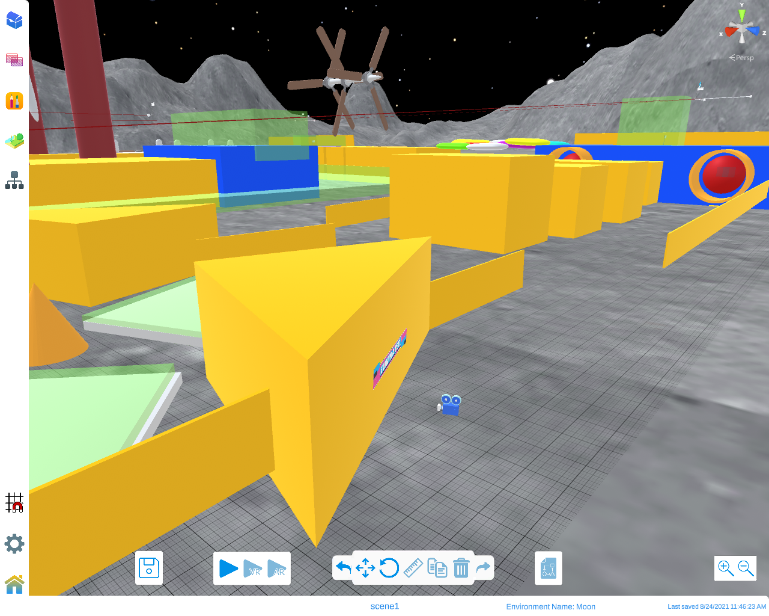
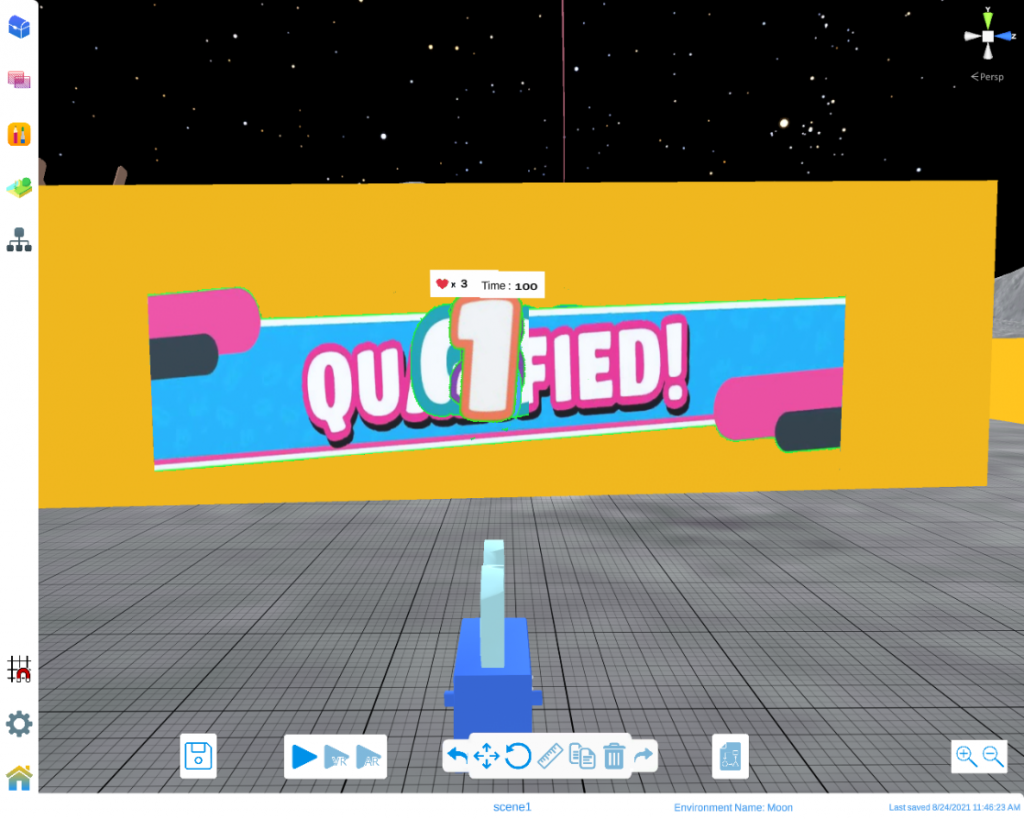
Here is an overview of the final product of the game.
II – Choosing Scene and Environment
The first thing we need to do is making a new project and call it “FallGuys” and we will call its scene “Scene1”.
We are going to choose the Moon environment.
III – Building Obstacles
This game has 7 different obstacles.
For the first obstacle, we will need:
- 3 Cubes with scale (7, 0.3, 7).
- 3 floor triangles with scale (8.5, 37, 8.5).
- 3 Tigger Boxes on each cube and parent each trigger box to its corresponding cube.
- 4 Walls.
- 1 Cone with scale (2.5, 2.5, 2.5) in the center of the 3 cubes.
Put these objects as shown in the image below.
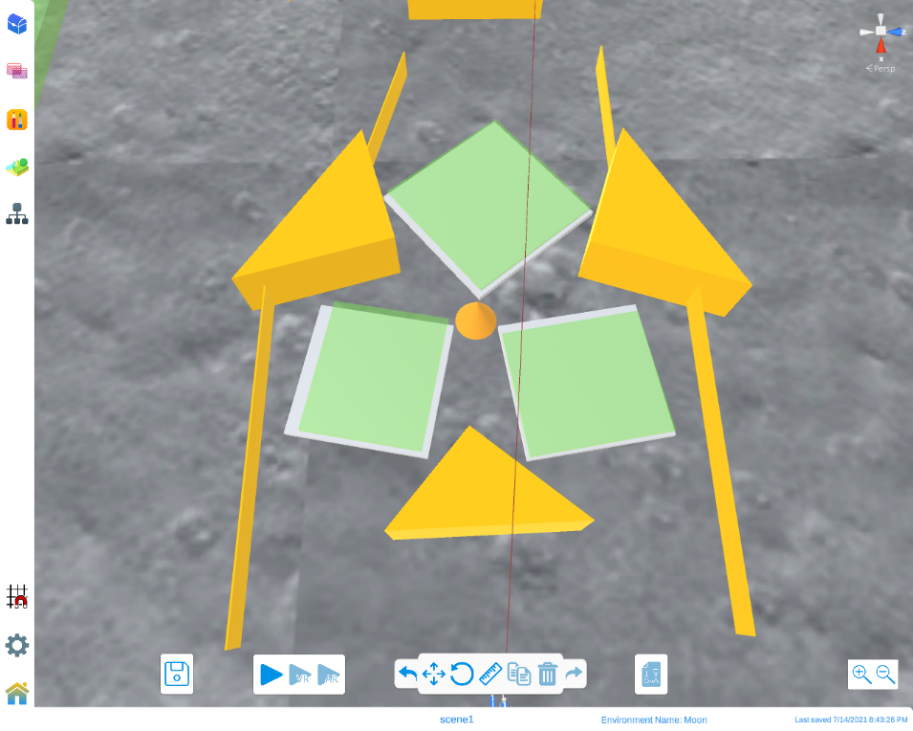
Put these objects as shown in the image below.
For the Second obstacle, we will need:
- 3 Block with scale (6, 5.5, 9) to make the middle way.
- 2 Walls at each side.
- 3 Block with scales (2, 2, 2), (3.5, 3.5, 3.5) and (5,5,5) to make the stairs.
- 1 Block with blue color with scale (14, 6.5, 28).
- Trigger Box on the blue box.
- Location Point on top center of the blue box.
- 2 Tubes with scale (5.6, 5.6, 5.6)fixed at the blue Block, one on each side of the stairs.
- 2 Red Spheres with scale (5.5, 5.5, 5.5), one inside each Tube and 2 Energy Explosions effect, one in front of each Sphere.
- Enable the physics for the 2 spheres
Tip: try to make the walls in a way that makes the balls get out of the map after their path.
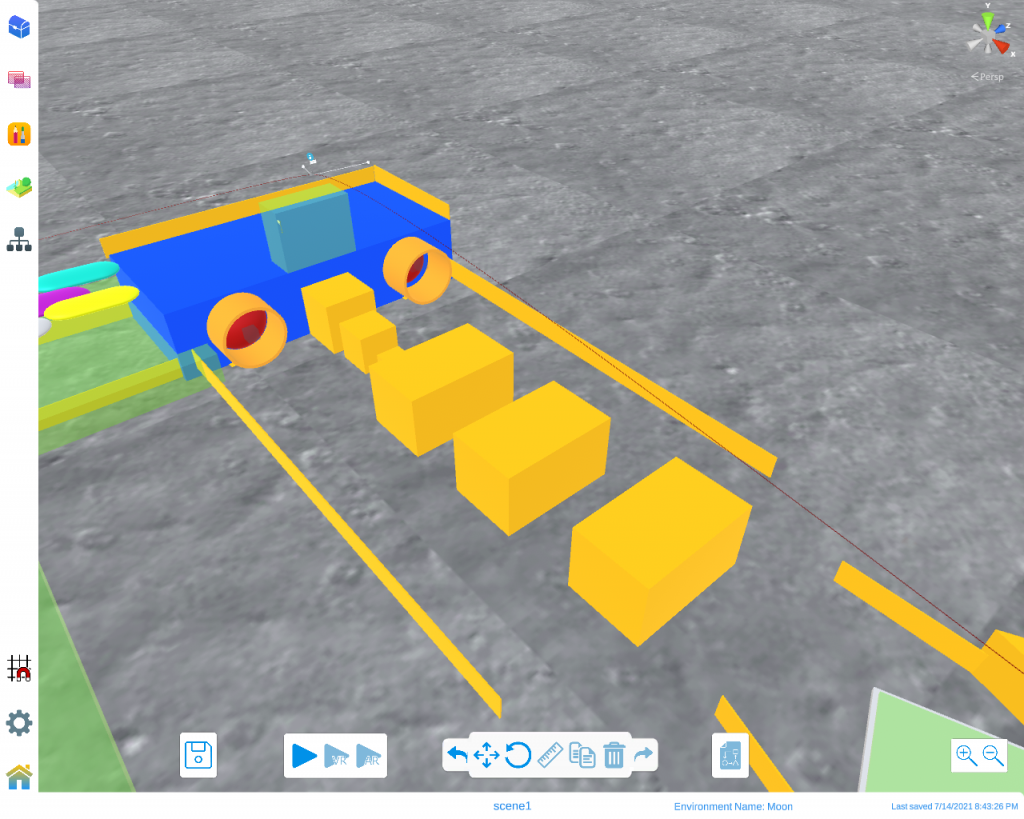
Tip: try to make the walls in a way that makes the balls get out of the map after their path.

This code will be repeated every 2 seconds it starts with playing the animation of the energy explosion then giving the spheres speed in the x-axis then repeating the process by resetting the position.
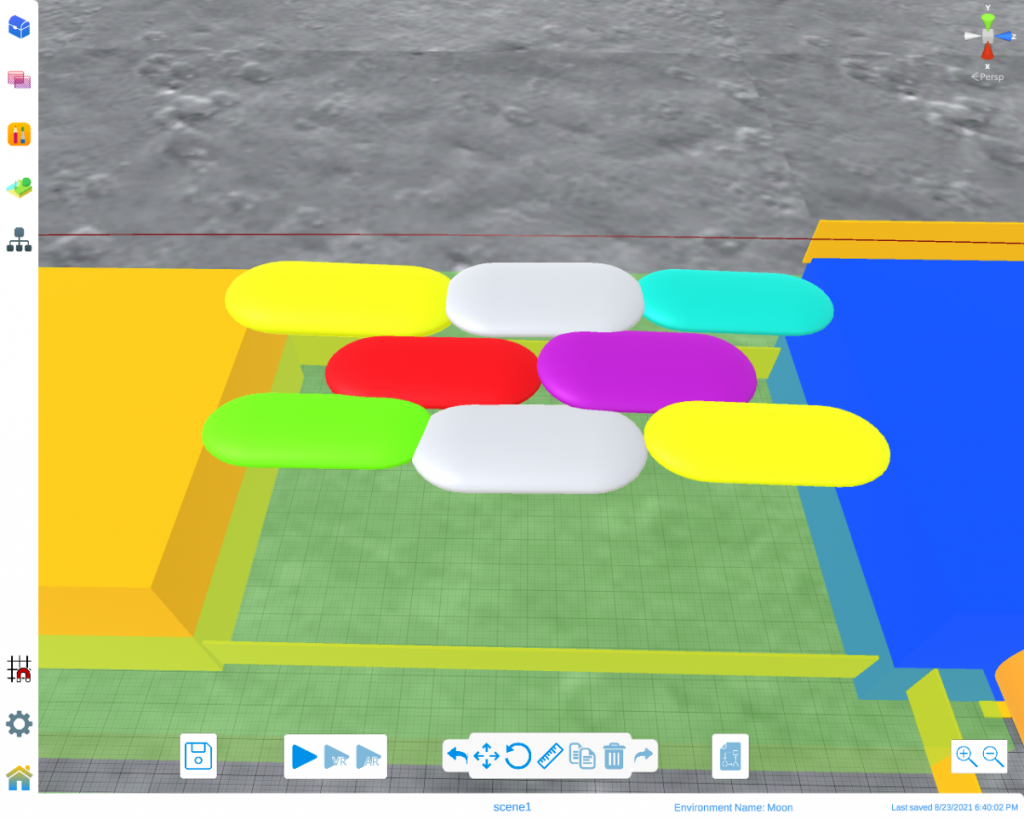
For the third obstacle, we will need:
- 7 Capsules with different colors and with scales (3, 3.5, 1). rotate them 270 in the x-direction. Position them at the same level of the blue cube of the previous obstacle.
- 2 Walls at each side.
- Tigger Box at the bottom of this obstacle and the next one.
- 1 Block after the 7 capsules with scale (13, 6, 16).
Tip: make no spaces between the capsules as shown in the image.
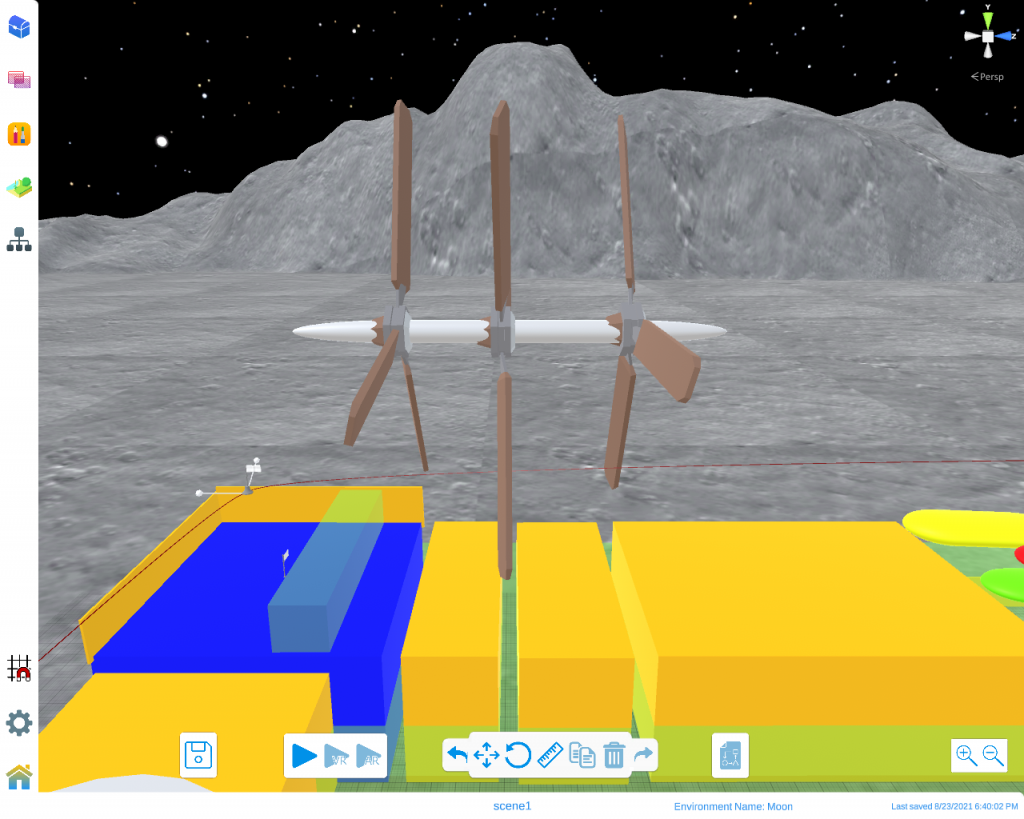
For the fourth obstacle, we will need:
- 3 Fans with scale (6,6,6). Enable physics and Kinematic Object for each one.
- 1 Capsule with scale (1, 9, 1) that passes with the center of the 3 fans.
- 2 Block with scale (13, 6, 4) and make spaces between them so that a small part of the fan can pass between them.
- Same 4,5,6 parts of the second obstacle.
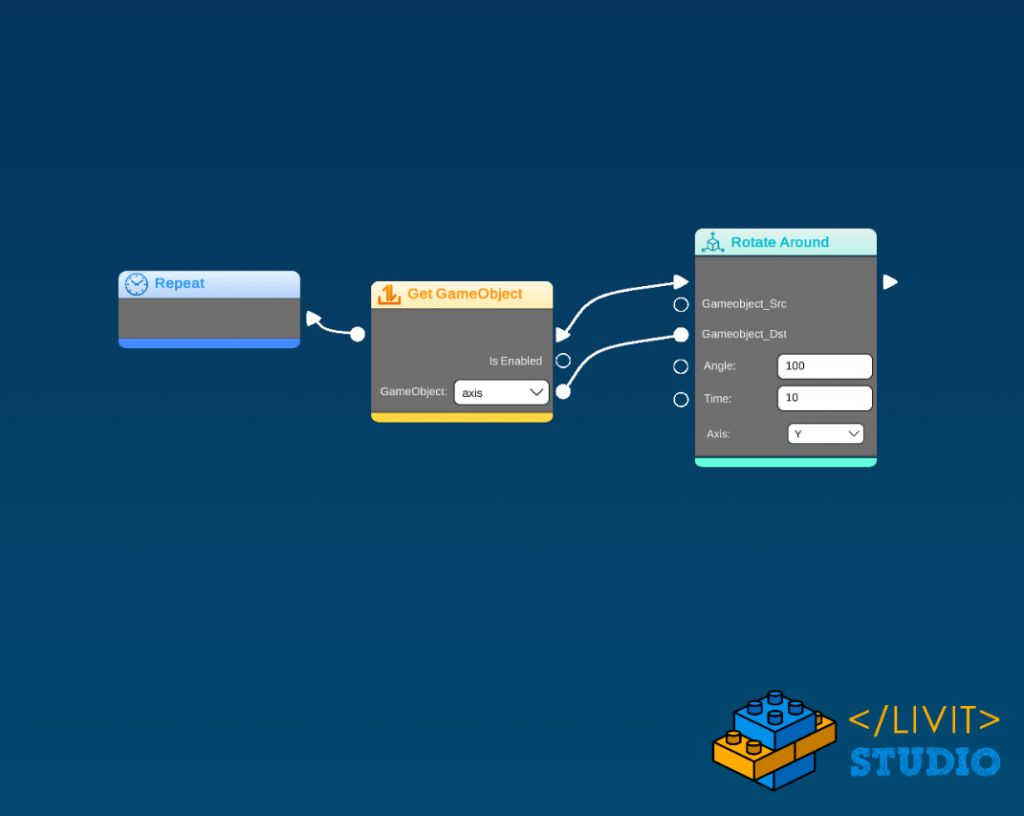
- Put the code of the first obstacle inside each fan to rotate.
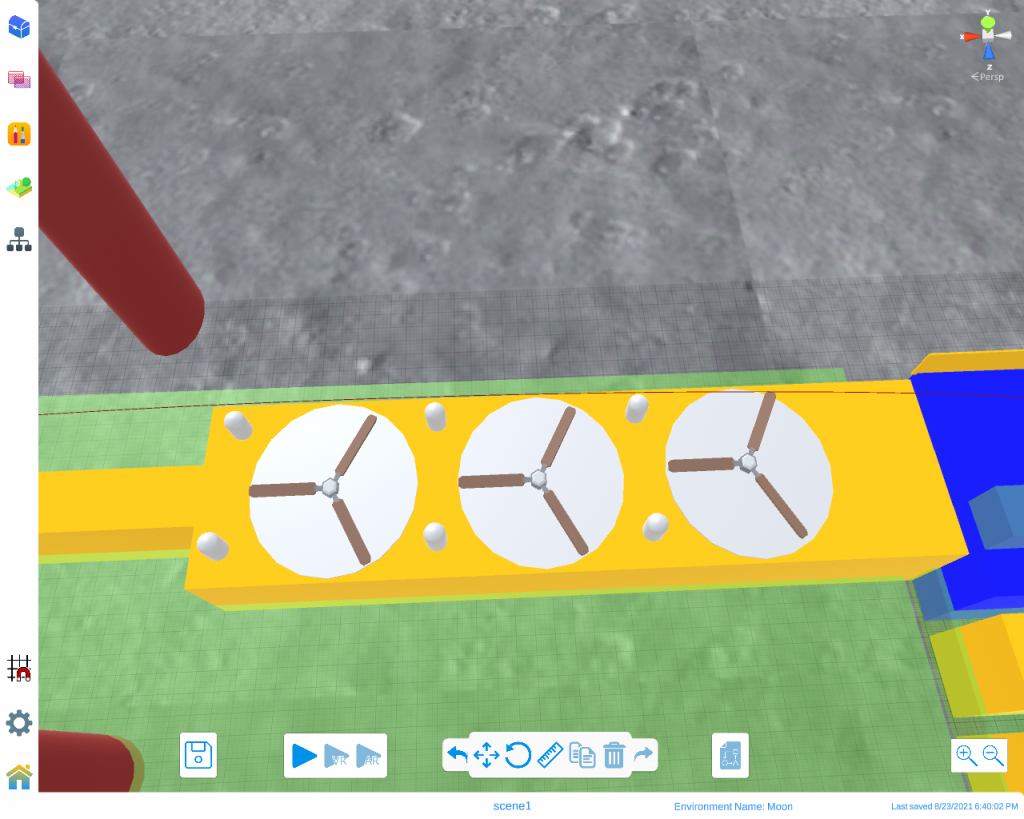
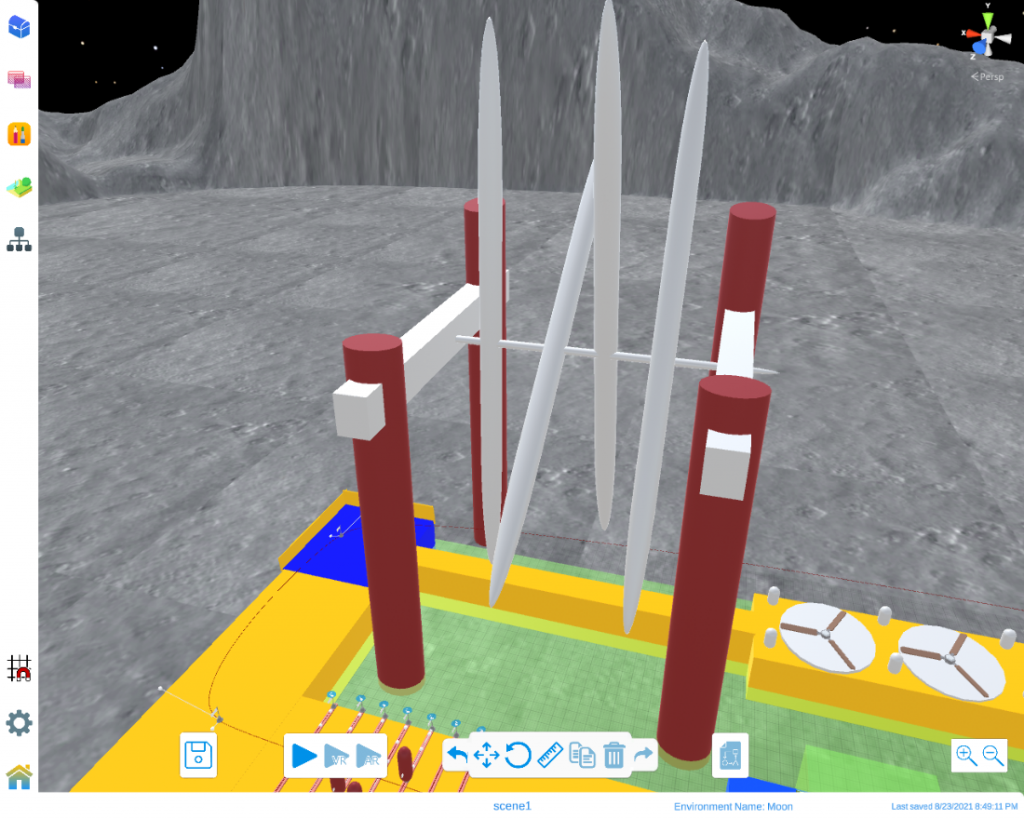
For the fifth obstacle, we will need:
- 1 Block with scale (38, 5, 9).
- 3 Cylinders with scale (8, 2.6, 8).
- 3 Fans with scale (2.3, 2.3, 2.3). Enable physics and Kinematic Object for each one.
- Put the code of the first obstacle inside each fan to rotate.
- 6 Capsules with default size.
One big Trigger Box below this obstacle and all the following obstacles.
For the sixth obstacle, we will need:
- 1 Block with scale (35, 5, 3).
- 2 Cubes with scale (0.6, 9, 0.2).
- 4 marron Cylinders with scale (4, 16, 4).
- 4 Capsules with scale (2, 25, 2).
- 1 Capsule with scale (0.6, 16, 0.2) that passes with the center of the 4 capsules and the 2 cubes.
- Same part 4 of the second obstacle.
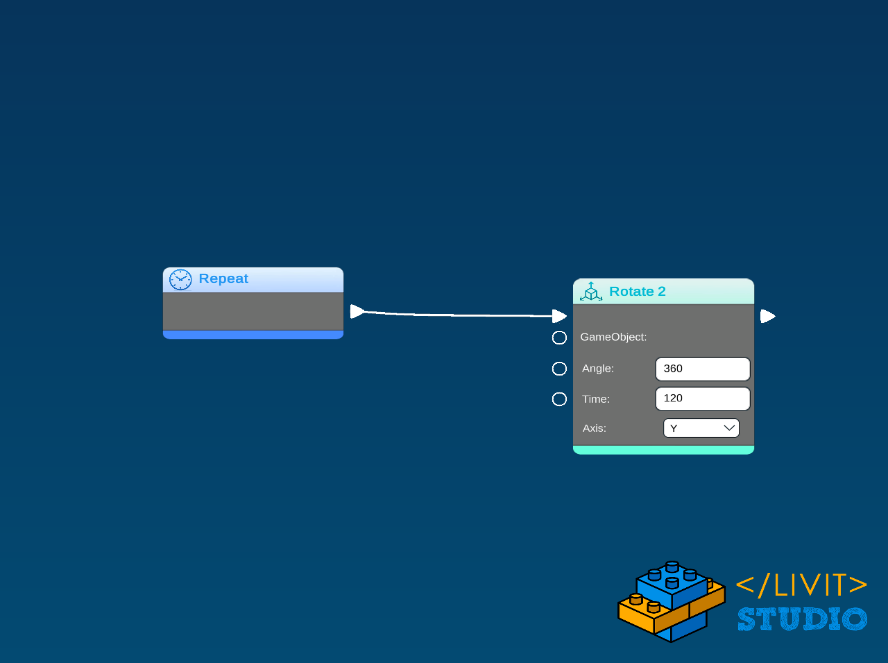
Inside the 4 Capsules add the following code to make them rotate around the central axis (capsule at the center).
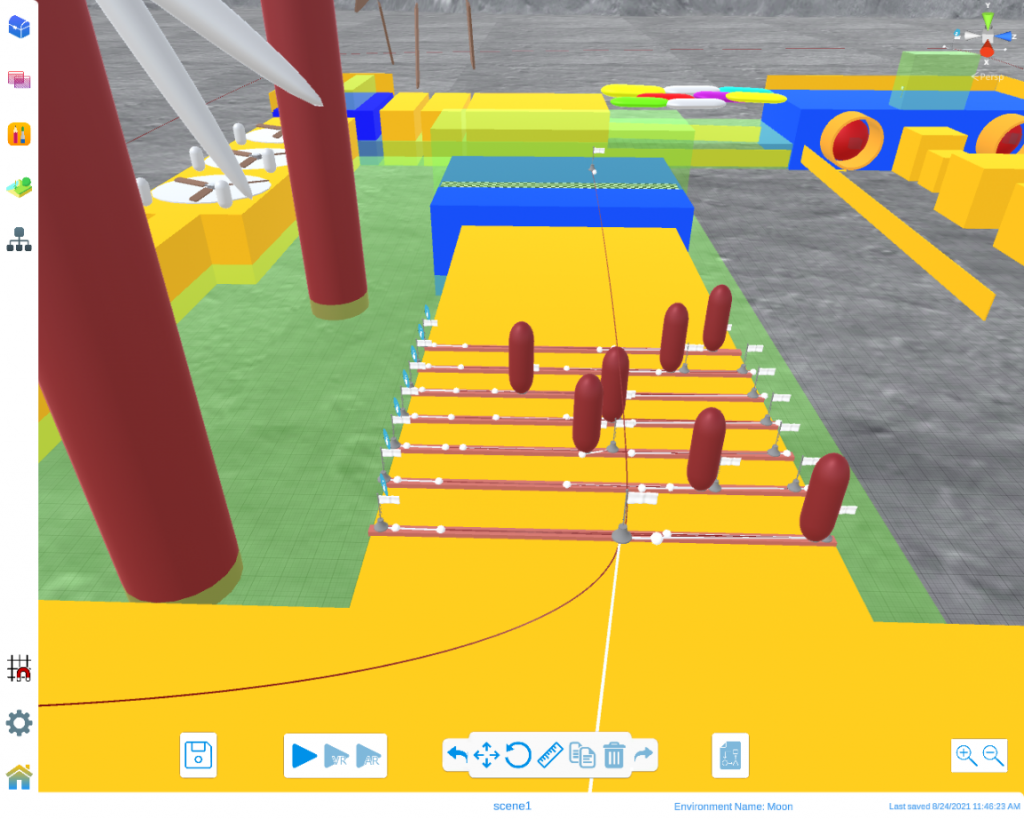
For the last obstacle, we will need:
- 2 Block with scale (11, 5, 33) and (35, 5, 14) one to continue the way for the level and the other for the level itself.
- 1 blue Block with scale (14, 7, 17).
- Import the Finish Line image and set it on the blue block.
- Trigger Box on top of the Finish Line.
- 7 marron parallel Cubes with scale (0.3, 0.2, 14) with the same spacing between each one.
- 7 marron Capsules with scale (3, 10, 0.07) one above each cube.
Tip: position each capsule in a random position on its corresponding cube.
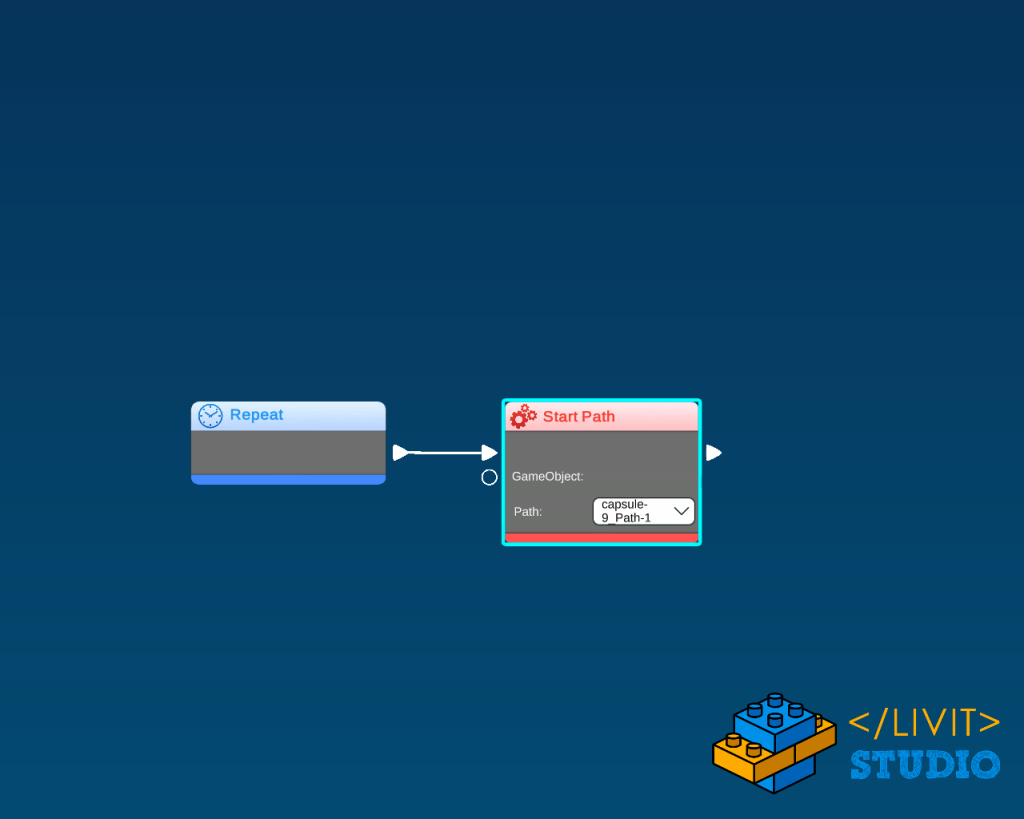
For each Capsule make a path that starts from its current position and goes to the edge of its corresponding cube then back to the other edge and finally back to its current position.
Finally, inside each Capsule add the following code.
Now, if you play the game you will see all the Fall Guys Obstacles but Some obstacles that the player should interact with does not interact. In addition, the player will never lose as there is no timer or life or even a win or lose the event. So, now we will start creating this.
IV – Player (Camera)
First obstacle interaction
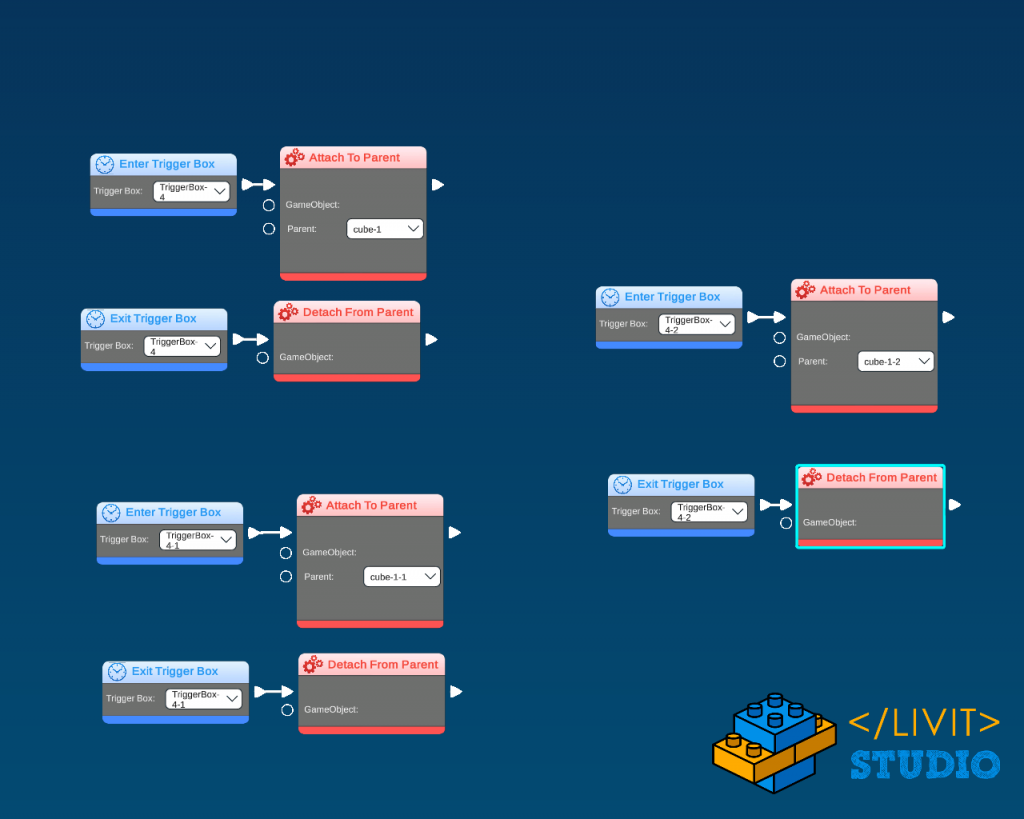
The first obstacle must affect the player and slow him down, to that we put 3 trigger boxes above each cube. What we need to do now is once the player entered the trigger box it is attached as a child to the corresponding cube and once he gets out of it he is detached.
Open the camera_0’s code and add these code blocks.
Lose Event
The Lose event is the largest event in the game as there are two ways to lose (out of time or lives). So, we need to handle both cases.
The First thing we need to do is to create two variables:
- Bool and name it “GameOver” with initial value false
- Int and name it“Life” with initial value 3.
The second thing is to create a new camera, name it camera_2 and set it in the position shown in the image.
Then add the Eliminated image in front of the camera.

Open the camera_0’s code, add another script from the + button and add these code blocks.
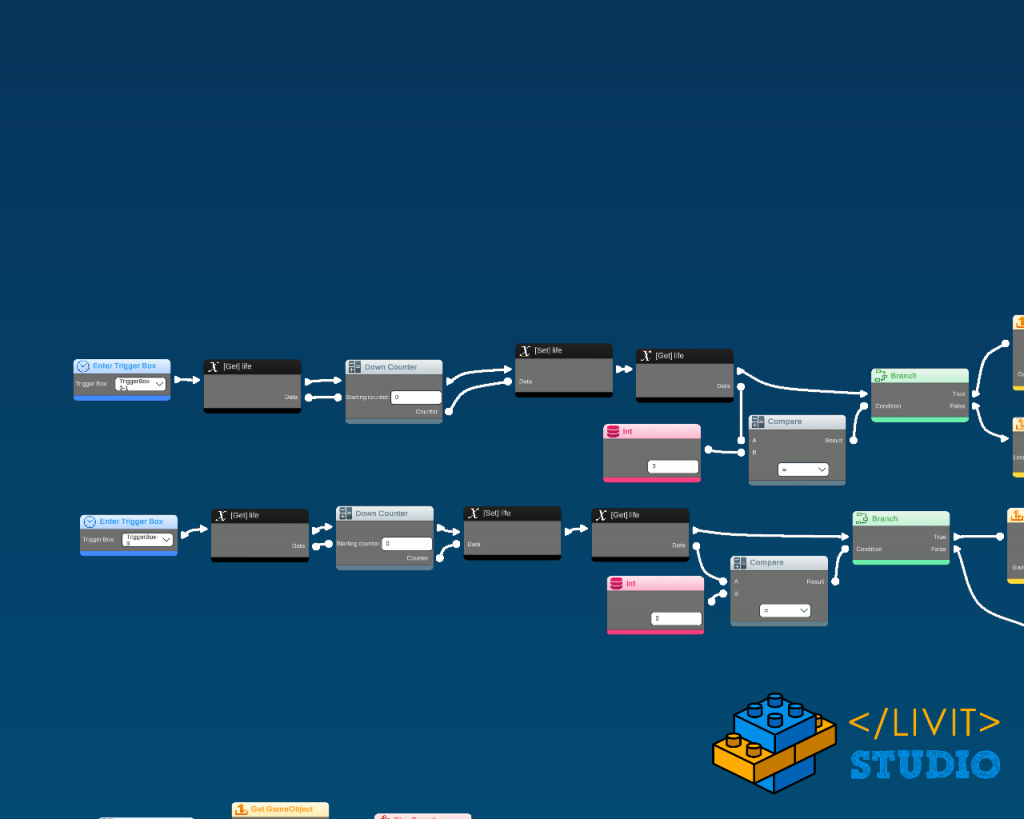
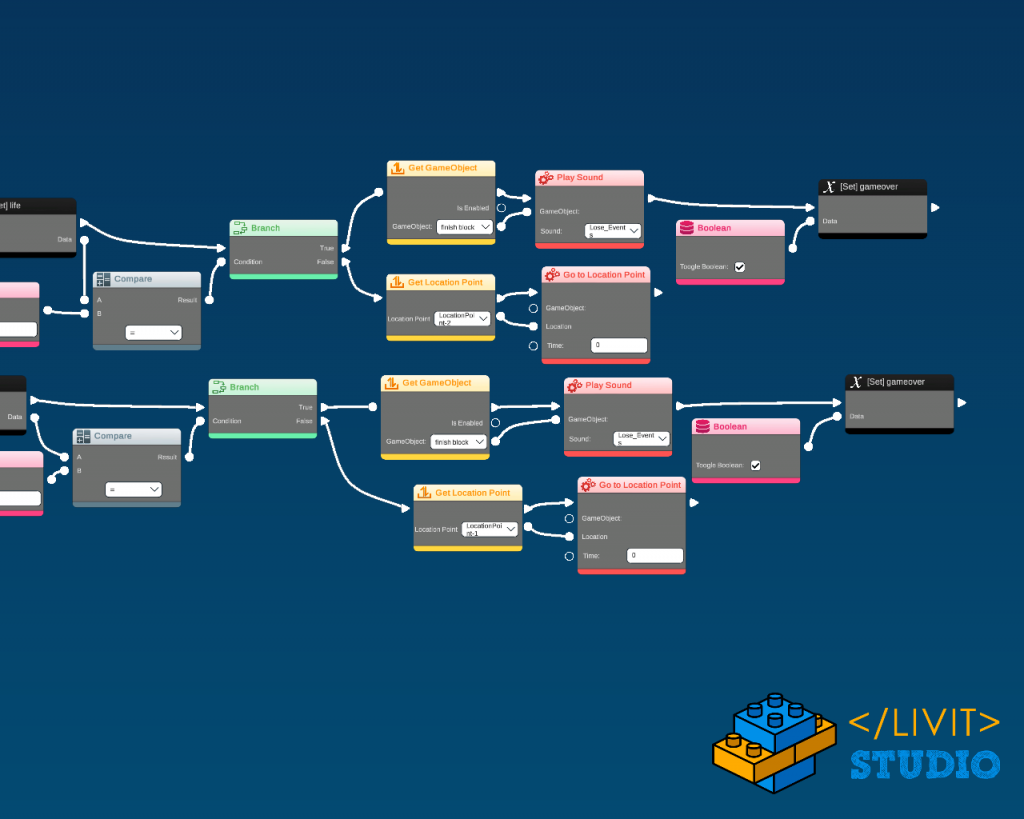
What this code is doing is that when the player enters the trigger boxes that we put in the third and the fifth obstacles it decreases the player’s life and checks if it is equal to zero or not. If not, it moves the player to the last checkpoint. If it is equal to zero, then it just plays a lose the sound effect that we put inside the blue block then switch to camera_2 that we created previously.
This handles the out of life lose condition, the other condition (time out) will be handled in the UI section.
V – UI
The UI elements are all children of the camera. And at the end of this part, they should look like this.
1- Timer
For this part, you will need 2 text boxes one to type in “Timer:” and the other to display the count down.
- Create 2 Text and arrange them so that in the play mode they are on the top center on the camera view.
- In the left one’s text body type “Timer :“.
- In the Right one’s text body it does not matter to type anything.
- Open the Right one’s code and add the following code.
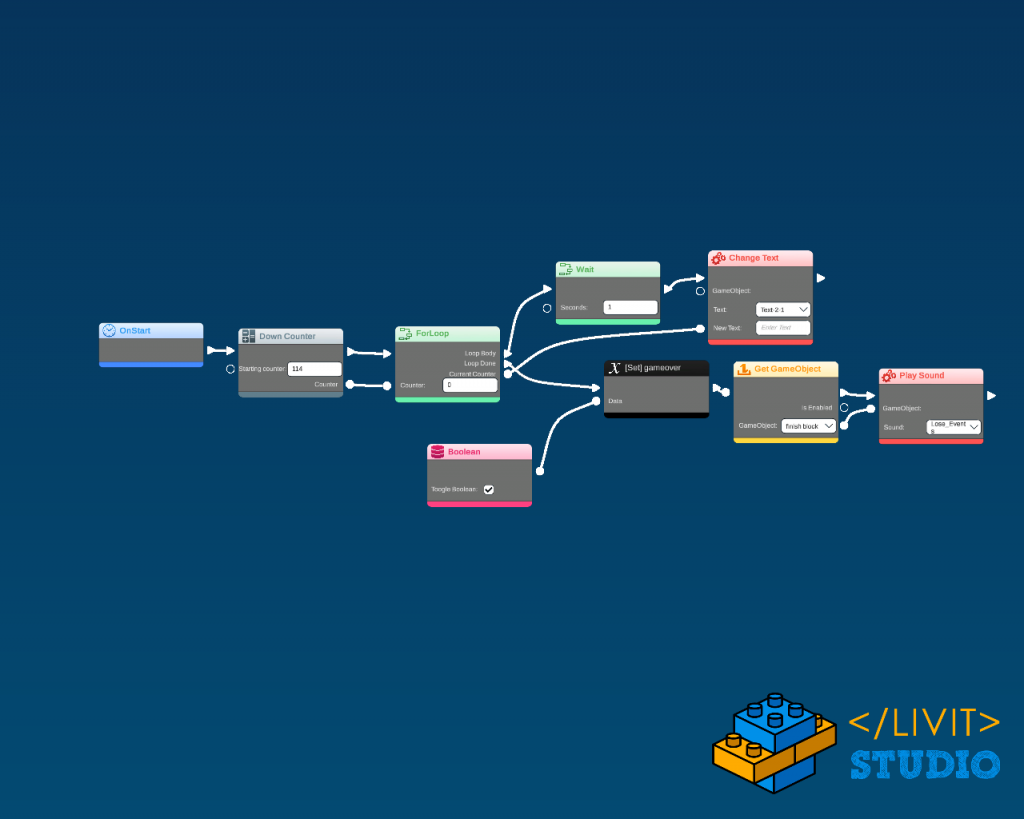
This code updates the text body by a down counter until it goes to zero then it plays the lose sound and change the variable GameOver to true.
2- Lives
For the lives UI you need to import the Heart image, add Text and write “3” in its body then put them on the left of the timer.
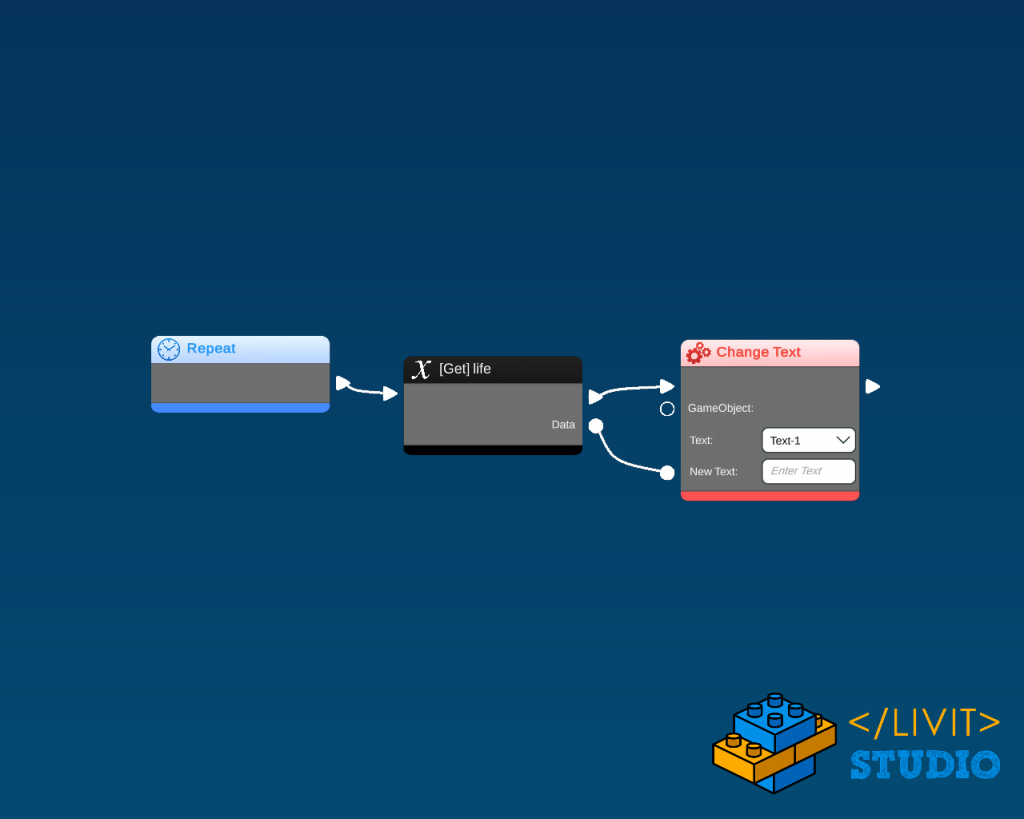
Open the Text code and add the following code.
3- Qualified
The First thing we need to do is to create a Bool variable and name it “Win” with the initial value false.
Import the Qualified image and put it on the front of the camera so that it is displayed at the center view of the camera in the play mode.
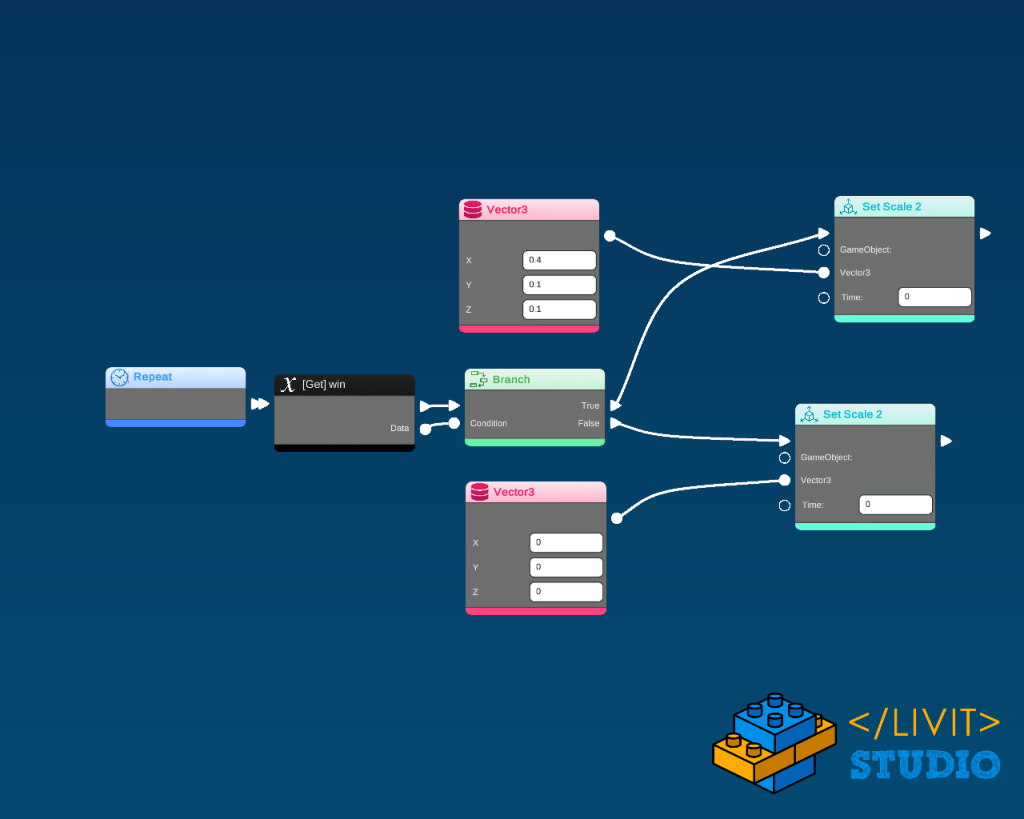
Note that Livit studio imported images cannot be disabled at on start as they are not game objects. So, we are going to scale it by (0,0,0) until the player passes the finish line (Win=true).—version Open the Qualified image and add this code.
4- 3 2 1 GO!
Import the 3 2 1 GO! images and put them on the front of the camera so that they are displayed at the center view of the camera in the play mode. In the 3 images add this code.
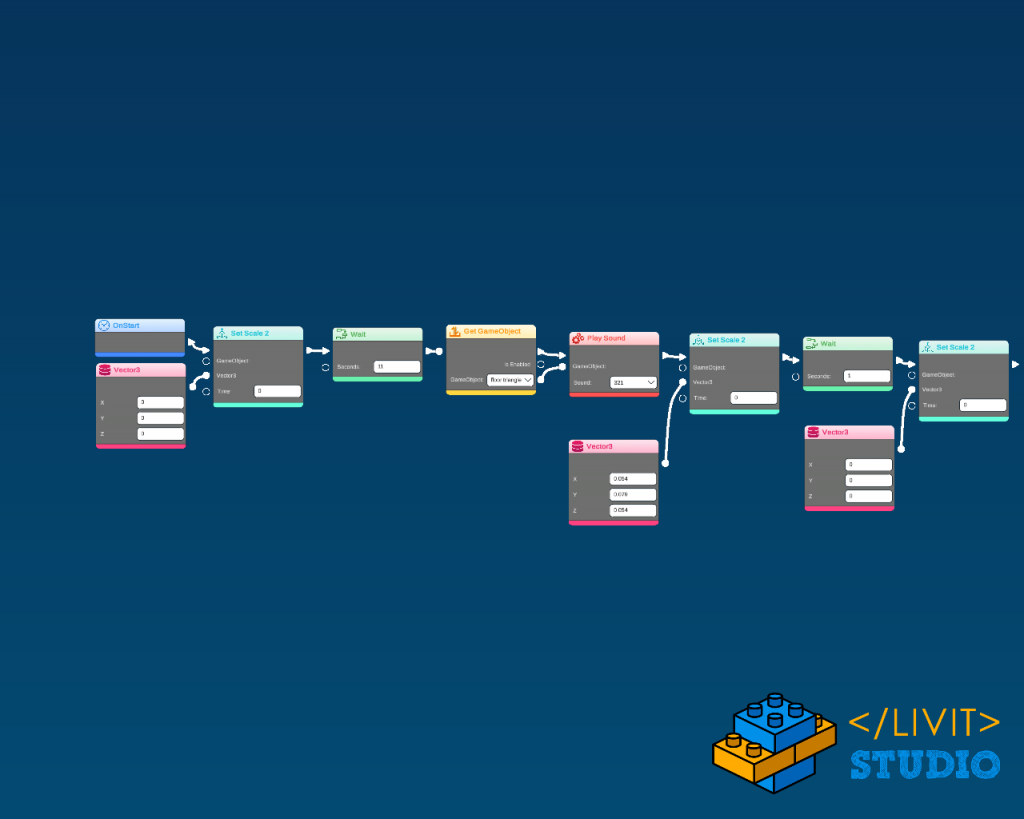
Note that we made the same image trick as in the Qualified by scaling up and down not by using enable and disable.
Also, note that we waited 11 seconds before starting the code this will be explained later in part VII.
The code inside 2 1 and Go will be the same except that we won’t play the sound as it was played in 3 and the wait time in 2 will be 12 seconds, in 1 will be 13 seconds and finally in GO will be 14 seconds.
That is why the game timer must be 114 seconds, to make the gameplay 100 seconds.
VI – Sound effects
Win Event
Open the camera_0’s code, add another script from the + button and add these code blocks.
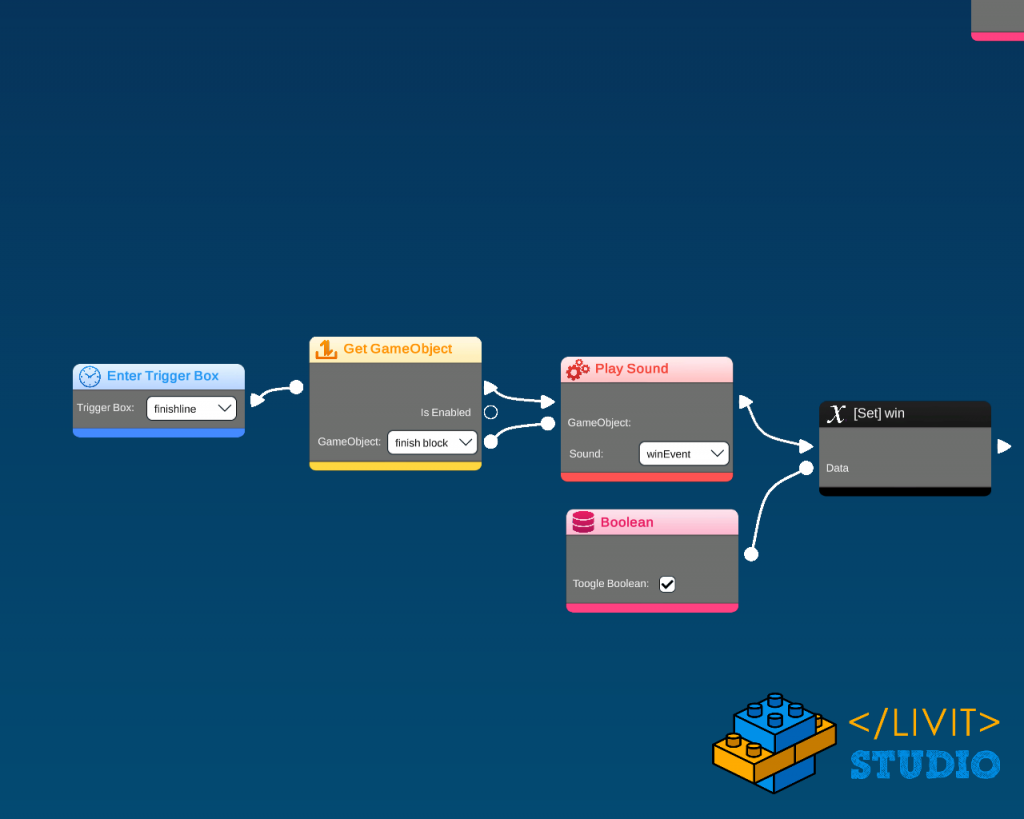
Set Win true at the finish line and play the winning sound. Where the trigger box is the one at the finish line.
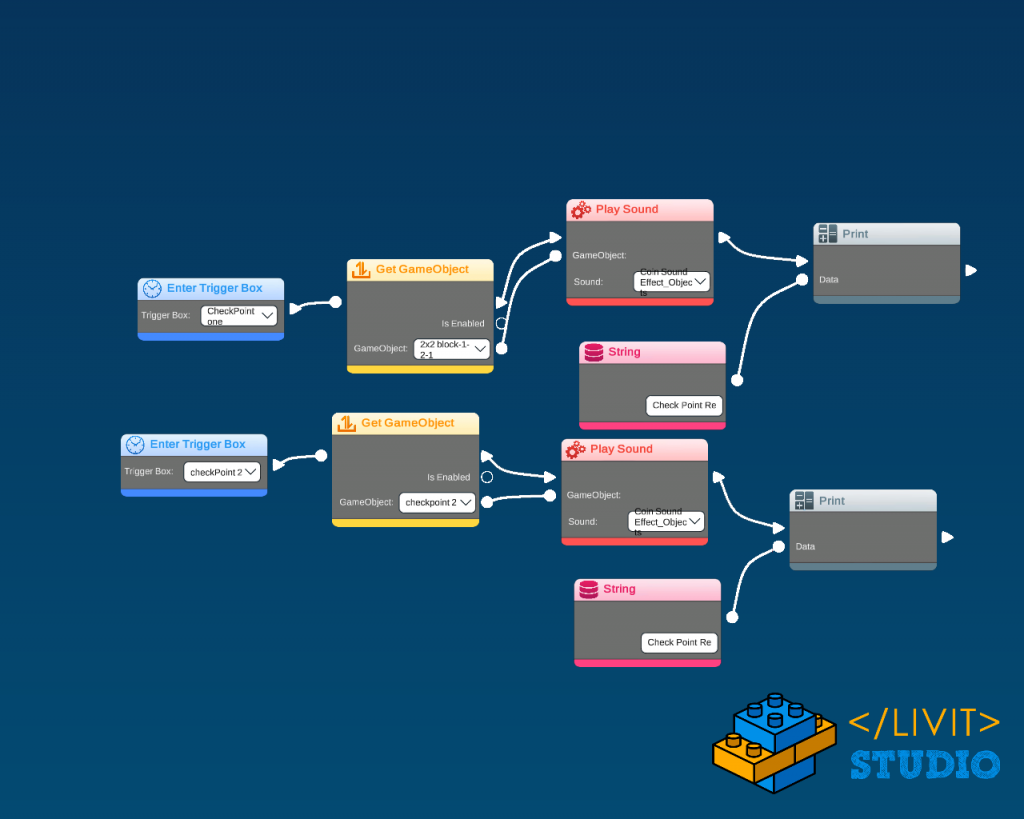
Check Point
Open the camera_0’s code and add these code blocks.
Background Music
Open the blue Finish Block’s code and add these code blocks.
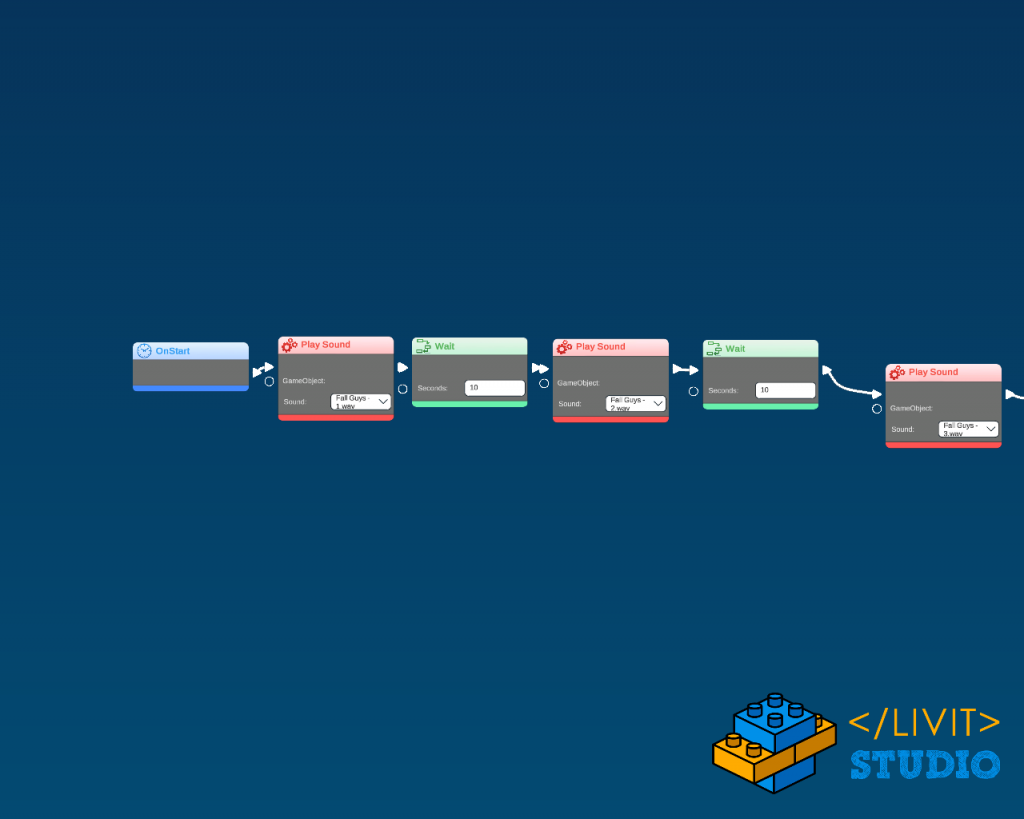
The idea of this code is because of the limitation of Livit studio to add a large sound file. So, instead, we cut the large sound file into 13 files each file is 10 seconds long, so on start on the scene the first audio will play and we will wait 10 seconds until it finishes then start the next one and so on.
VII – Intro camera effect
This trick is very simple and will give the game a beautiful look.
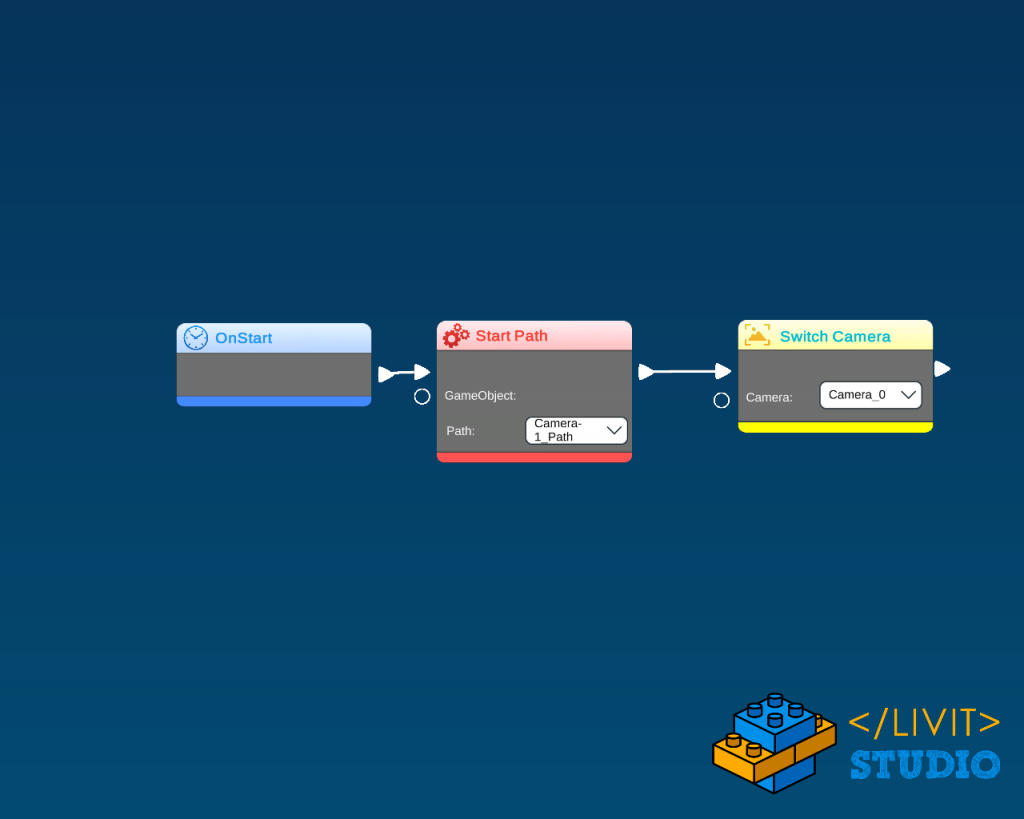
Start by creating a new camera “camera_1” and make a path that starts just above the starting level and ends at the finish line to make a quick look at the entire level. Also, you need to make the path duration 10 seconds so that after the path (11 seconds) the 3 2 1 GO effect will starts
Open the camera_0 ’s code and add these code blocks.
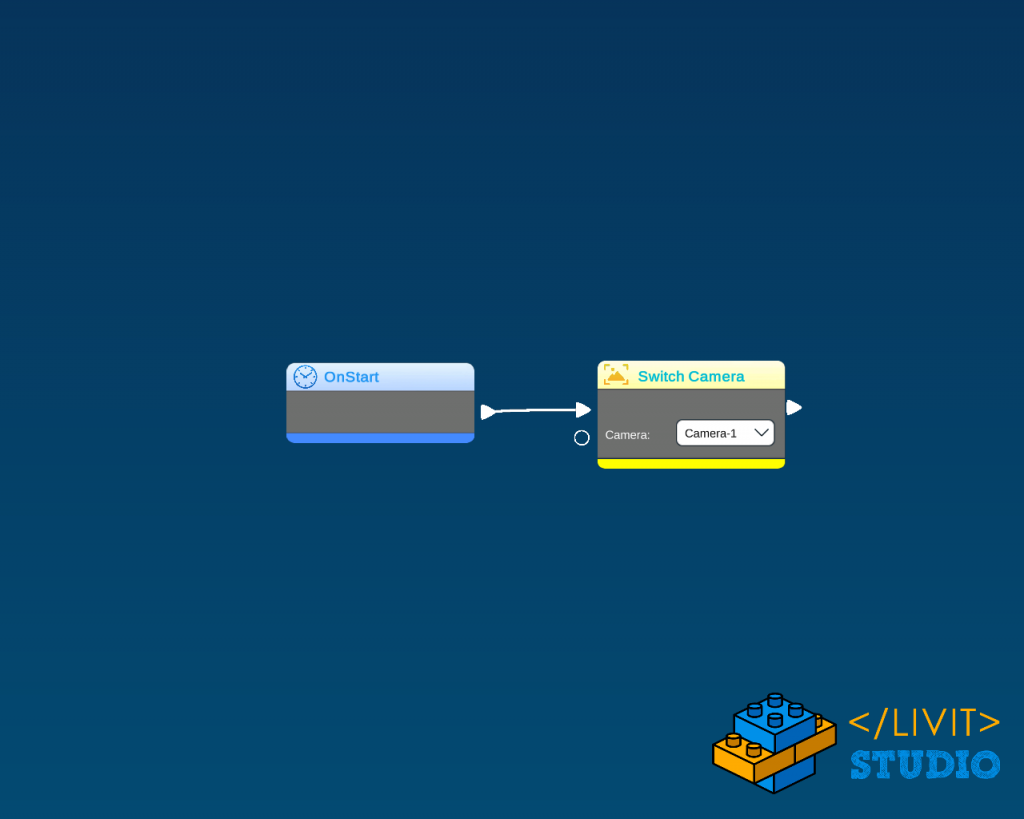
Open the camera_1 ’s code and add these code blocks.